Get Ready to Master the Art of the Smokey Eye Look
Y’all, I’m so excited to share with you the secret to achieving the ultimate smokey eye look! For those of you not in the know, the smokey eye look is all about blending and shading eyeshadows to create a dramatic and sultry effect. But it’s not just about looking fabulous; mastering the art of blending and shading eyeshadows has many benefits such as enhancing eye shape, making eyes appear larger, and highlighting eye color!
Types of Eyeshadow: From Satin to Matte and Everything in Between!
When it comes to eyeshadow, there are so many different types and finishes to choose from. Whether it’s a matte look or a shimmery finish, choosing the right one can really make a big difference in the final outcome of your smokey eye look.
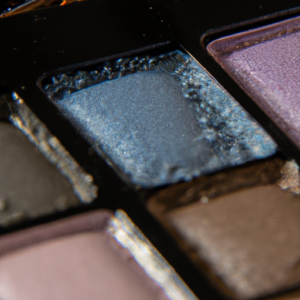
So, let’s talk about the different types of eyeshadow finishes. One of the most popular is the satin finish, which has a slight sheen to it and tends to be more sheer. Another finish is the matte finish, which has no shimmer and is great for creating a natural look. If you’re looking for something with a bit more sparkle, then a shimmer finish is perfect for you.
Color selection is also an important factor when it comes to eyeshadow. You want to choose shades that complement your skin tone and eye color. For instance, if you have blue eyes, colors like gold, bronze and brown will make them really pop. If you have brown eyes, colors like purple and green are great options.
Preparing the Face: The First Steps to Achieving a Perfect Smokey Eye Look!
Before delving into the application of eyeshadow, it is crucial to prepare your face and eyelids first. This means removing any dirt or oil on your face, and making sure that it is free from any impurities. Once you’ve cleaned and moisturized your face, it’s time to apply your base makeup.
The purpose of applying base makeup is to even out your skin tone and provide a smooth surface to work on. Make sure to use a primer and foundation that suits your skin type to avoid any discomfort or irritation, and blend it properly on your face to avoid harsh lines. Remember that a smooth canvas means better blending, so take your time in prepping your face for the coveted smokey eye look.
After you’ve applied your base makeup, the next step is to prime your eyelids. You want to create a smooth, blank canvas on your lids so that the eyeshadow can adhere better and last longer. Use a thin layer of eye primer to even out the color of your eyelids and allow your eyeshadow to pop.
Take your time in preparing your face and eyelids before moving on to the application of eyeshadows. A smooth, even base will make the process of blending and shading easier and make the final look more polished!
4. Application Techniques: Time to Blend and Shade!
Now that you have prepped and primed your eyelids, it’s time to apply the eyeshadow. First, grab a blending brush and add the lightest shade to your eyelids, which will act as the base color. Make sure to blend it evenly all over your eyelids.
Next, use a medium shade eyeshadow and apply it to your crease area with a crease brush. Be sure to blend it well so that there are no harsh lines visible. This will help in building depth and dimension to your eye look. Keep going until the shade is perfectly blended and looks smooth and seamless.
Now, take your darkest shade eyeshadow and apply it to the outer corner of your eyes, bringing it upwards in a smokey fashion. Blend it well and make sure it is seamlessly transitioned into the medium shade. Remember, blending is key to achieving the perfect smokey eye.
Don’t forget to add a small amount of the darkest shade to your lower lash line to balance out the top. Once you’ve applied all your eyeshadow, go in with a clean blending brush and blend all the shades together one last time for a flawless finish.
Follow these steps and you’ll be on your way to a fierce and sultry smokey eye look in no time. For more in-depth tutorials on eyeshadow application and other beauty tips, check out this Smokey Eye Makeup Tutorial for Beginners.
5. Finishing Touches: Adding Flair to Your Smokey Eye Look!
Alright, so you’ve carefully selected your eyeshadow colors, prepped your face and eyelids, and seamlessly blended and shaded your way to that perfect smokey eye look. Now it’s time to add those final touches that will make your eyes pop and stand out even more.
First and foremost, don’t forget to add mascara to your lashes. This will help define and separate them for a more dramatic effect. When adding mascara, start at the base of your lashes and wiggle the wand as you work your way up to the tips. Don’t be afraid to apply two or three coats to really enhance your lashes.
Another trick to enhance your smokey eye look is to add a bit of highlight to the inner corner of your eyes. This can be done by using a small brush to apply a shimmery or light eyeshadow shade to the inner corner of your eyes and blending it outwards. This technique will help make your eyes appear brighter and more awake.
Lastly, if you have any fallout or excess eyeshadow under your eyes, you can use a clean brush or makeup wipe to carefully remove it. This will help keep your look clean and polished without any stray smudges or smears.
By following these finishing touches, your smokey eye look will be sure to turn heads and make a lasting impression. So go ahead and add that flair to your already-perfect makeup look!
Wrap It Up: Achieving the Perfect Smokey Eye Look
Alright, we’ve covered a lot of ground today, but we’re almost there. To summarize, the smokey eye look is a classic and dramatic makeup style that can be achieved by mastering blending and shading techniques. There are plenty of eyeshadow types to choose from, but it’s important to consider finish and color when making your selection. Before application, make sure you have applied your base makeup and prepped your eyelids. Now it’s time for the fun part: applying your eyeshadow. Remember to start light and gradually build up your color intensity, and don’t forget to blend! Practicing different shading techniques can help you achieve your desired look. Once your eyeshadow is in place, finish the look with a coat of mascara and a touch of brightness in the inner corner of your eyes. Just a few reminders before you go: always consider the occasion when choosing your eyeshadow intensity level, and remember that practice makes perfect. If you’re using dark eyeshadow shades, be sure to keep the rest of your makeup fairly neutral. And when it comes to applying eyeshadow, it’s better to start lightly and build up rather than going in with too much product at once. So go forth and conquer the smokey eye look!