Get Smokin’ Hot with a Killer Smokey Eye
Hey ya’ll, it’s your girl talkin’ about the hottest makeup trend right now – the smokey eye! If you wanna look fierce and sexy, then you gotta learn how to do it. But don’t worry, I’ve got you covered. In this tutorial, I’ll give you all the deets on how to slay that smokey eye like a boss.
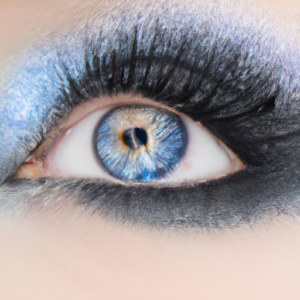
First things first, let’s define what a smokey eye is. It’s basically an eyeshadow technique that creates a soft, blended effect using darker colors. But why is it so popular? Well, it’s because it’s versatile and can be worn for any occasion. You can glam it up for a night out, or tone it down for a subtle daytime look.
Before we create this killer look, let’s make sure we have all the necessary tools. You’ll need an eyeshadow primer, eyeshadow brushes, and a variety of eyeshadow shades that range from light to dark.
Preparing for the Look: Gathering my Tools
Before I dive into creating this trendy look, I always make sure I have the right tools. For a proper smokey eye, I recommend gathering some essential items:
- Eyeshadow Primer
- Eyeshadow Brushes: Flat and Fluffy
- Eyeliner: Pencil or Gel
- Mascara: Black
- Q-Tips
When preparing for a smokey eye, I always start by taking a moment to organize my space. I lay out my products and tools on a clean table, ensuring everything is within reach. This helps me get into the proper headspace and gets me starting on the right foot.
Once I have everything organized, I start by applying eyeshadow primer all over my lid. This step is crucial, as the primer will help your eyeshadow last longer and appear more vibrant.
Next comes choosing the base color. I usually opt for a neutral, matte color that’s slightly lighter than my skin tone. This provides a nice base and allows the darker colors to stand out more.
Lastly, I always make sure to have some Q-tips on hand. Smokey eyes can be a bit messy, but these little cleaning sticks are perfect for touching up mistakes or removing excess powder.
Gathering and organizing your tools is a crucial step to achieving a stunning smokey eye. Not only will it make things easier for you, but it will also help you stay focused and in the zone. So, take the time to gather all the necessary items and get ready to create the perfect smokey eye!
I’ll Teach You How to Create a Smokey Eye with This Step-by-Step Tutorial!
Are you ready to learn how to create the perfect smokey eye look? Let’s get started! Don’t worry, it’s not as hard as it looks, and with a little bit of practice, you’ll be able to master this makeup technique!
Step One: Apply Eyeshadow Primer
The first step in creating a smokey eye is to apply eyeshadow primer. Primer will help your eyeshadow stay in place longer and prevent creasing. Apply a small amount of primer on your eyelid with your finger or a brush, making sure to blend it well.
Step Two: Choose Your Base Color
Choose a neutral eyeshadow as your base color. A light shade such as ivory or taupe works best. Apply this color all over your eyelid using a fluffy brush.
Step Three: Add Depth with Darker Colors
Take a darker eyeshadow shade, such as brown, gray or black and apply it on the outer corner and crease of your eyelid. Use a blending brush to blend it well, making sure all the edges are soft and there are no harsh lines. Keep applying the darker color in small amounts until you get the desired intensity and depth.
Step Four: Blend for a Soft Finish
It’s important to blend the eyeshadows well to create a soft, smokey finish. Use a clean blending brush to blend the colors together, and make sure there are no harsh edges or lines.
Step Five: Define the Lash Line
To make your eyes stand out, take a black or dark brown eyeliner and draw a thin line on the upper lash line, smudging it slightly with a small brush or your finger. This will create the illusion of thicker, fuller lashes.
Step Six: Highlight with Lighter Shades
Take a light shimmery shade, such as champagne or gold, and apply it on the inner corners of your eyes and on your brow bone using a small brush. This will brighten up your eyes and make them look bigger and more awake.
Step Seven: Complete the Look with Mascara
Mascara is the finishing touch for any eye makeup look, and the smokey eye is no exception. Apply a few coats of mascara to your top and bottom lashes, making sure to coat every lash evenly. You can also use false lashes to add more drama to your look if desired.
And voila! You have a gorgeous, sultry smokey eye look that’s perfect for any occasion. Don’t be afraid to experiment with different colors and techniques to find the perfect look for you. With a little bit of practice, you’ll be a smokey eye pro in no time!
Finishing Touches: The Final Steps for a Perfect Smokey Eye
Now that you’ve created the base of your smokey eye, it’s time to add the finishing touches that will take your look from good to great.
Define the Lash Line
One of the easiest ways to make your eyes stand out is to define your lash line. Use a black or dark brown eyeliner to create a thin line along your upper lash line. Start from the inner corner and work your way out, making the line thicker as you go. Then, use a smudge brush or your finger to blend the line out slightly for a softer look. You can also add liner to your lower lash line, but be careful not to make it too thick or it will overwhelm your eyes.
Highlight with Lighter Shades
To add dimension to your smokey eye, use a lighter shade of eyeshadow to highlight your brow bone and inner corner of your eye. This will create a contrast with the darker shades and make your eyes look more open and awake. Use a small brush to apply the lighter shade to these areas and blend it in with the rest of your eyeshadow.
Complete the Look with Mascara
The final step in creating a perfect smokey eye is to apply mascara. Use a volumizing formula to add drama to your lashes and make them stand out. Start at the base of your lashes and wiggle the wand back and forth to create volume. Then, brush the wand through your lashes to separate them and remove any clumps.
By following these simple steps, you can create a flawless smokey eye that will turn heads wherever you go. Remember, practice makes perfect, so don’t be afraid to experiment with different shades and techniques until you find the perfect look for you.
Wrap it Up: Tips and Encouragement for Nailing the Smokey Eye Look
And there you have it – my foolproof guide to achieving the iconic smokey eye! It might take a bit of practice to perfect, but trust me, it’s worth it. A classic, bold smokey eye is always a showstopper and can be the perfect finishing touch to any look.
But before you go off experimenting and trying out different variations of the smokey eye, here are a few final tips to keep in mind:
- Practice makes perfect! Don’t be discouraged if you don’t nail it on the first try. Keep practicing and tweaking your technique until you achieve your desired result.
- Blend, blend, blend! This is the key to achieving a seamless and professional-looking finish. Take your time blending your shadows together to avoid any harsh lines.
- Don’t be afraid to experiment with color! While classic black and gray shades are always a safe bet, don’t be afraid to try out different hues like purples, blues, or greens to mix things up.
So go ahead, have fun with it, and rock that smokey eye like the confident and fierce queen that you are!
Smokey Eye FAQ
How to do a simple black smokey eye?
Yo, fellow beginners! You wanna rock that smokin’ hot look? No sweat, I’ve got you covered with some insider tips. First things first, gather your tools – a black eyeshadow, an angled brush, and a blending brush will do. Start by priming your eyelids to ensure your eyeshadow stays put. Next, apply a light base color all over your lid with a flat brush. Use a transition shade right above the crease with a fluffy brush to blend. Then, use an angled brush and press the black eyeshadow on the outer corner of your lid, forming a V shape. Make sure to blend it out with a fluffy brush. For an extra oomph, add the same black shadow to your lower lash line, remembering to blend it out. The final touch? Some black eyeliner on your upper lid and a dash of mascara. Ta-da! You’ve successfully achieved a killer black smokey eye, fit for any event or occasion.
How to do a subtle smokey eye?
Okay, so you wanna do a smokey eye but you don’t wanna look like a raccoon? I’ve got you covered! Here’s how I achieve a subtly smokey look:First, I apply a medium-toned eyeshadow all over my lid. Then, taking a darker shade, I blend it into my outer corner and slightly along my crease. Be sure to blend thoroughly for a soft transition.Next, I grab my trusty eyeliner and line my upper lashline, winging it out slightly. I also tightline my lower waterline for extra definition.To finish off the look, I curl my lashes and apply a few coats of mascara. And voila! A subtle yet smoldering smokey eye.One tip I’ve learned along the way is to start with a light hand and gradually build up the intensity. That way, it’s easier to control the darkness and avoid going too heavy too fast.Remember, practice makes perfect – so keep experimenting until you find the look that works for you!
How to do smokey eye with pencil?
Oh boy, doing a smokey eye can be intimidating, especially for beginners! But fear not, I have a foolproof technique for you. For starters, I like to use a pencil eyeshadow because it’s easier to work with and more forgiving if you make mistakes. First things first, prep your eyelids with an eyeshadow primer or concealer to ensure everything stays put. Then, take your pencil eyeshadow and line your upper lash line. Start from the outer corner, making the line thicker as you go towards the center of your eye. Next, use your finger or a smudge brush to gently blend the liner upwards towards your crease. You want to create a gradient effect with the darkest color at the lash line and fading upwards. Now, take a lighter shade of eyeshadow and apply it to the center of your eyelid, blending it into the darker color. This creates dimension and adds a pop of light to the middle of your eye. Lastly, blend a little of the darker pencil eyeshadow onto your lower lash line and add some mascara to finish off the look. Boom, there you have it – a simple and easy smokey eye using pencil eyeshadow. Don’t forget to practice and have fun with it!