Hey There, Are You Ready to Curl Those Lashes?
Are you tired of your eyelashes always looking straight and lifeless? Well, my friend, you’ve come to the right place! Today, let’s talk about the beauty hack that can make a big difference in your everyday look: Lash Curling!
When we say “lash curling,” we’re referring to the method of curving the natural shape of your eyelashes upwards to help them appear longer and fuller. Not only does it add length, but it also provides a better canvas for your eyeshadow – making your eyes pop.
Now, if you’re like me, you may be hesitant to try this beauty hack because you have short lashes. But fret not, I’ve got you covered! In this blog, we’ll be discussing a short lash curling trick that will give you the same desired effect as long lashes. Before we dive in, here’s a great resource for making your short eyelashes look fabulous with mascara (check it out!)
Alright then, let’s get started!
Benefits of Curling Lashes: My Personal Experience
Let me tell you, curling my lashes has been a game-changer! For one, it creates the illusion of longer lashes. Who doesn’t want that? Plus, it’s the perfect way to enhance your eyeshadow and make your eyes pop even more.
But here’s the real secret: You don’t need long lashes to get the benefits of curling them. That’s right! Even if you have short lashes like me, curling them can make a huge difference.
The Short Lash Curling Trick
Hey there! I’m excited to share with you my favorite lash curling trick that works just as great as traditional lash curlers — but it’s wayyy quicker and easier! Plus, you only need a few tools and supplies that you might already have on hand. So let’s jump right in and get you those luscious, curly lashes you’ve been dreaming of!
Supplies Needed
- Mascara (any brand, waterproof preferred)
- Thin makeup brush or spoolie
- Lash primer (optional but recommended)
Step-by-Step Instructions
- Apply a thin layer of lash primer if you have it. This step will help your lashes hold onto the curl better.
- Apply one coat of mascara to your lashes. Make sure to wiggle the wand at the base of your lashes and then pull upward to the tips. This will help give them some lift.
- While your lashes are still wet, take your thin makeup brush or spoolie and gently push your lashes upward towards your brow bone (or whichever direction you want them to curl). Hold them there for a few seconds.
- Finish off with another coat or two of mascara.
- Voila! You now have perfectly curled lashes without the hassle of a lash curler!
Tips & Tricks
Here are a few tips to keep in mind while doing this trick:
- Make sure your mascara is still wet when you push your lashes up. If it dries, it won’t hold the curl as well.
- Use a spoolie or brush that’s thin and flexible enough to bend your lashes without breaking them.
- If you want a more dramatic curl, you can repeat the process after each coat of mascara.
- Don’t use too much pressure when pushing your lashes up. You want to hold them in place, not bend them at a harsh angle.
- Always be gentle and take your time. Rushing through this step might lead to clumpy or spidery lashes!
So there you have it, folks — my go-to lash curling trick that’s quick, easy, and effective. Try it out and let me know what you think! Your new fluttery lashes are just a few brush strokes away. 😉
Tricks and Tips for Perfectly Curled Lashes
When it comes to lash curling, there’s always room for improvement. Here are some expert tips and tricks to help you achieve that perfect curl every time:
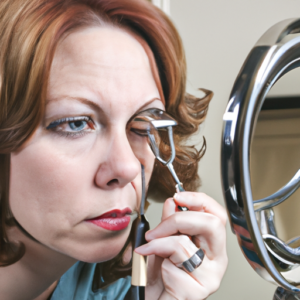
Bend your curler
To get a more natural curl and avoid any harsh angles, try bending your lash curler slightly. This will help it conform to the shape of your eye and lashes, resulting in a better curl.
Heat it up
If you have stubborn lashes that just won’t curl, try heating up your lash curler with a hair dryer or warm water beforehand. Be sure to test it on the back of your hand to prevent any burns.
Loosen the grip
A common mistake is to press too hard with the curler, which can result in crimped or bent lashes. Instead, try a gentle grip and hold it for a few extra seconds at the tips for a more natural-looking curl.
Layer it up
For an extra boost of curl, layer your mascara underneath and on top of the curled lashes. This will help them hold their shape and keep the curl in place all day.
Stick to natural fibers
When choosing a mascara, opt for one made with natural fibers like cotton or silk. Synthetic fibers can be heavy and weigh down your lashes, undoing all your hard work.
With these tips and tricks, you’ll be able to achieve beautifully curled lashes every time. Remember to take your time, be gentle, and practice, practice, practice!
Wrap it Up: Final Thoughts on Lash Curling
Alrighty folks, that’s a wrap on lash curling! Hopefully, you’ve learned a thing or two about how to add some curl to those beautiful lashes of yours.
Remember, curling your lashes can make a huge difference in the overall look of your eyes by providing increased length and enhancing your eyeshadow. Plus, it’s a super quick and easy beauty trick.
If you’re short on time, try out our short lash curling trick – it only requires a spoolie brush and your trusty eyelash curler. Voila, instant curl!
A few tips to keep in mind: don’t curl your lashes too much or too often, as this can lead to damage. Also, try heating up your eyelash curler with a hair dryer for a more dramatic curl.
Thanks for tuning in, and happy lash curling!