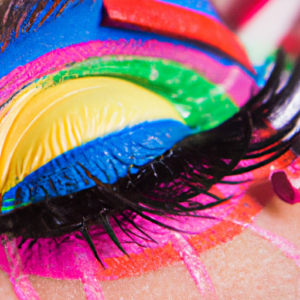
Introducing the Amazing World of Mascara!
Hey there, fellow makeup lovers! Today, I want to introduce you to the magical world of mascara. Mascara is a must-have in my makeup routine, and I’m sure many of you would agree. It’s a makeup product used to enhance lashes and make them appear longer, thicker, and more voluminous. But did you know that different eye colors can benefit from specific types of mascara? Read on to find out why mascara is essential and how it can enhance your eye color.
Choosing the Right Mascara: Let’s Find the One for You!
Choosing the right mascara is pivotal in enhancing your eye color and achieving your desired look. But with an overwhelming variety of mascaras in the market, you need a guide that can help you pick the right one without breaking the bank.
There are many factors to consider when choosing the right mascara for you. Firstly, make sure it matches your eye color. For example, if you have blue eyes, go for a dark brown or navy blue mascara to make your eyes pop. On the other hand, if you have green eyes, try a black mascara that will accentuate the natural beauty of your eyes. When selecting, also take into account the length and texture of your lashes, plus what you want to achieve with the mascara. Are you looking for more length, volume or just tint? There are different mascara types for every need.
Another tip is to understand the different brush types available. If you have short lashes with little volume, you may want a mascara with a thick brush that can distribute the product evenly. Meanwhile, if you already have long lashes, a thinner brush that can separate the lashes might be a better choice.
So, what’s the perfect mascara for you? It’s all about trying different types and brands, and finding what suits you best. Don’t hesitate to experiment and ask for makeup suggestions. Eyelashes are a crucial element of your makeup look, so choose wisely!
Applying Mascara: The Ultimate Guide
Alright, let’s get into the nitty-gritty of applying mascara. First things first, it’s essential to choose the right mascara for your eye color and lash type. Once you’ve made your selection, it’s time to apply it correctly.

Begin by wiping off any excess mascara from the wand on a tissue or paper towel. Next, apply the mascara to the base of your lashes, wiggling the wand back and forth to ensure the product covers each individual lash. To create length, hold the wand vertically and apply mascara to the tips of your lashes. Repeat this process on your other eye.
One of the biggest issues with mascara is clumping, which can be avoided by applying multiple thin coats instead of one heavy coat. Allow each coat to dry before applying another. Another tip is to use a clean spoolie or old, clean mascara wand to brush through your lashes to separate them and eliminate any clumps.
If you’re prone to smudging, try applying mascara to your bottom lashes first, allowing them to dry before applying to your top lashes. This helps to prevent the transfer of mascara onto your eyelids.
Now, let’s talk about those extra finishing touches. Using an eyelash curler before applying mascara can make a significant difference in curling and lifting your lashes, making them appear longer and fuller. Hold the curler at the base of your lashes for a few seconds before moving to the middle and then to the tips.
To add more volume, try using a lash primer before applying mascara. This can also help your mascara last longer throughout the day.
With these tips and tricks, you’ll be rocking fabulous lashes in no time!
Finishing Touches:
Alright folks, now that we’ve talked about choosing the right mascara and applying it correctly, it’s time for the finishing touches. One tool that can make a huge difference is an eyelash curler. I know, they look intimidating, but trust me, they’re worth it. Start by placing the curler at the base of your lashes, then gently squeeze and hold for a few seconds before moving it up towards the ends. Repeat on the other eye, and voila! Instantly longer and fuller lashes.
But wait, there’s more! For those of you looking to add even more volume to your lashes, try dusting a little bit of powder on them before applying mascara. Yep, you read that right. Baby powder or translucent powder will do the trick. Simply dip a Q-tip in the powder and run it along your lashes to add some extra grip for the mascara to stick to.
Now that you’ve curled and powdered, it’s time to apply mascara again. But this time, focus on the roots of your lashes, wiggling the wand back and forth as you pull it towards the ends. This will really help to add that extra volume you’re looking for.
And there you have it, folks. The perfect finishing touches to take your lashes to the next level. Don’t forget to check out this article for even more tips and tricks on finding the perfect mascara shade for your eye color.
Well, that’s a wrap!
So, now that you know how to choose and apply mascara for your eye color, you’re well on your way to having stunning lashes. But before you go, let me give you a few final tips to make your mascara experience even better.
Firstly, always make sure to replace your mascara after about three months of use. This will prevent any bacteria buildup and keep your peepers safe and healthy.
Secondly, if you’re looking for even more volume, try using a lash primer before applying mascara. It’s a game changer!
Lastly, don’t be afraid to experiment with different types of mascara and techniques to find what works best for you. There’s no one-size-fits-all approach to mascara, so have fun with it!
Thanks for reading, and happy mascara-ing!