Get Plump Lips With Lip Contouring: A Complete Guide
Hey there, lovelies! Are you looking to achieve that perfect pout without resorting to cosmetic surgery? Look no further than lip contouring! This technique involves using lip liner and lipstick to create the illusion of fuller lips, and it’s quickly becoming one of the hottest makeup trends around.
So, what exactly is lip contouring? Essentially, it’s the art of using a combination of lip liner, lipstick, and highlighter to create a defined, symmetrical shape for your lips. The end result is a perfectly plumped, Instagram-worthy pout that you’ll love to show off.
The benefits of lip contouring are many. Not only can it make your lips look fuller and more defined, but it can also help to balance out the proportions of your face. Plus, once you master the technique, it’s fairly easy to do on a daily basis, meaning you can rock a perfect pout all day, every day.
Yo, You Need These To Get Your Lip Contouring Game On Fleek
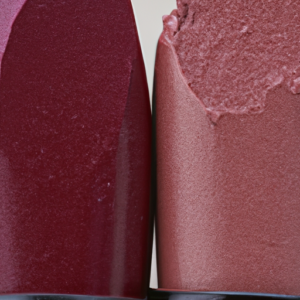
Hey there, my fellow makeup enthusiasts! Listen up because I’m about to spill the tea on what you need to get started with lip contouring. If you want to make your pout look more plump and defined, these three items are essential: lipstick, lip liner, and concealer.
Lipstick
When it comes to lipstick, you want to choose a shade that complements your skin tone and overall makeup look. If you’re going for a bold, dark lip, make sure the color is even and pigmented. If you’re aiming for a more natural look, opt for a nude or light pink shade.
Lip liner is a must-have when it comes to lip contouring. You’ll want to choose a color that matches your lipstick and use it to outline the shape of your lips, as well as fill them in. This will help define and shape your lips, making them appear fuller and plumper.
Concealer
Concealer is used to clean up any mistakes and define the edges of your lips. This will make your lip contouring look more precise and polished. You’ll want to choose a shade that matches your skin tone and apply it around the edges of your lips with a small brush.
With these three items in hand, you’re ready to slay your lip contouring game. Let’s move on to the prep work that will make your lips look even more flawless.
3. Preparing Your Lips
Time to get our lips ready for the perfect contour! Before starting makeup application, I like to remove any existing lip products and prep my lips. This helps the color stay on longer and look smoother. Here’s what to do:
Exfoliation
The first step in lip preparation is exfoliating your lips. This gets rid of any dry, flaky skin on the lips, leaving them smooth and primed for lipstick. You can use a gentle lip scrub or even just a damp washcloth to buff away any dead skin. My favorite lip scrub is a mixture of sugar and coconut oil. Massage it on your lips for about 30 seconds, then rinse it off with warm water.
Moisturizing
After exfoliation, it’s important to moisturize your lips. This keeps them hydrated, healthy, and looking their best. You can use a lip balm or hydrating serum to keep your lips moisturized throughout the day. I like to use a lip balm with SPF during the day and a thicker, more intense lip balm at night. Applying lip balm before bed helps keep your lips soft and smooth for the morning.
Now that our lips are prepped and ready, let’s move on to the fun part – the actual lip contouring! For a step-by-step guide, check out this article.
Get Ready to Pucker Up: A Step-by-Step Guide to Lip Contouring
Are you tired of plain, boring lips? Do you want to give your pout some extra definition and volume? Lip contouring may be just what you need! Here is a step-by-step guide to help you achieve the perfect luscious lips:
Step 1: Outlining the Lips
The first step is to outline your lips carefully with a lip liner that is one shade darker than your lipstick. This will help define your lips and prevent the lipstick from bleeding or feathering. Start from the center of the cupid’s bow and work your way to the corners of your mouth.
Step 2: Filling in the Lips
Next, fill in your lips with the lipstick of your choice using a lip brush. For a more precise application, you can use a lip brush to help you reach the corners and edges of your lips.
Step 3: Creating a Highlight Effect
To create a highlight effect, use a concealer that is one shade lighter than your skin tone, and apply it to the center of your lips. This will make your lips appear fuller and more defined. You can also use a shimmery highlighter to add a bit of sparkle to your lips.
Step 4: Blending and Finishing
To complete the look, use a brush or your finger to blend the edges of your lips with the concealer or highlighter. This will create a seamless transition between your lipstick and your skin. Once you’re done, blot your lips with a tissue to remove any excess product.
One More Thing:
Don’t forget to smile once you’re done – your lips will look absolutely fabulous! Remember that lip contouring takes some practice, but once you’ve mastered the technique, you’ll be able to create endless lip looks to match any outfit or occasion.
5 Tips for Achieving Perfection in Lip Contouring!
Alright, lovely ladies! Time to add a little oomph to those lips of yours. Here are five tips that’ll help you achieve the perfect contoured pout. Trust me, this ain’t no rocket science!
Choose the Right Color Combination
You wouldn’t wanna look like a clown, do you? Hence, make sure you choose the right shade of lipstick and liner that complement your skin tone. If you’re going for a natural look, opt for nude or light shades that’ll give you the desired effect.
Use Concealer to Clean Up the Edges
You know what’s worse than crooked or uneven lips? Smudged lipstick! To prevent that from happening, use a concealer around the edges of your lips. This will also give them a sharp and defined look.
Blend Thoroughly
No one wants two-toned lips. Hence, make sure you blend your lipstick and liner properly for a seamless transition. Use a brush or your finger to blend it out. If you want to take it up a notch, add a dab of highlighter to your cupid’s bow for an added effect.
Bold Lips are not Always the Answer
Remember, the aim is to accentuate your lips by giving them a fuller look and not make them look like a cartoon character. If you’ve got thin lips, focus on defining them and opt for more neutral shades. Bold colors are best suited for those who already have fuller lips.
Exfoliate and Moisturize
Want to know the secret to soft and supple lips? Exfoliation and moisturization! Make sure your lips are free of any dead skin. Scrub them gently with a toothbrush or use a sugar scrub. After that, moisturize your lips with a lip balm to keep them hydrated and plump.
There you go, ladies! That’s all there is to it. Follow these tips, and you’re sure to achieve luscious contoured lips that’ll make everyone envious. Go ahead, pout away!
Wrap It Up: The Final Word on Lip Contouring
Well folks, there you have it! You are now officially equipped with all the knowledge you’ll need to become a lip contouring expert. By following these simple steps, you can take your lips from drab to fab in no time.
Remember, the key to perfect lip contouring is in the preparation. Exfoliating and moisturizing your lips will ensure that they are smooth and supple, providing the perfect canvas for your lipstick and liner. From there, it’s all about outlining, filling in, and creating a highlight effect to really make your lips pop!
When it comes to color combinations, it’s important to choose shades that complement one another. And don’t forget to use a little concealer to clean up any edges that may have gone awry. Be sure to blend thoroughly for a seamless finish.
All in all, the benefits of lip contouring are numerous. Not only can it enhance the shape and size of your lips, but it can also give you a more defined pout and help your lipstick stay put for longer. So, what are you waiting for? Go ahead and give it a try!