Get ready to ditch your store-bought makeup remover
Hey there, makeup lovers! If you’re like me, you probably dread the moment when you have to take off your makeup every night. Unfortunately, many of the makeup removers on the market today are filled with harsh chemicals that can wreak havoc on our skin. But fear not! I have discovered a DIY makeup remover that is not only all-natural, but also super easy to make. With just a few simple ingredients, you’ll be able to take off your makeup without any damage. So, say goodbye to those store-bought options and let’s get started!
Before we get into the recipe, let’s talk about why you should consider making your own makeup remover. For starters, many commercial makeup removers contain harmful chemicals that can cause irritation, dryness, and other skin issues. Plus, buying a new bottle every time you run out can get expensive. By making your own, you know exactly what’s going into the product and can customize it to your skin’s needs. Are you ready to take the first step towards healthier skin? Let’s go!
But before we dive into making our own makeup remover, we need to gather our supplies. Head on over to best-false-eyelashes.com for a full list of what you’ll need.
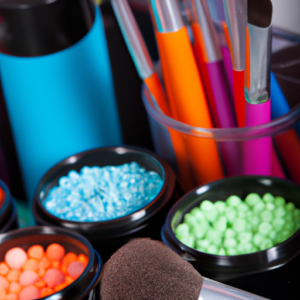
Get Your Ingredients Together!
Alright, it’s time to get started on making your own makeup remover! Here’s what you’ll need:
If you’re wondering where to find these ingredients, don’t worry! Most natural health stores carry these items, and you can even find them online. Plus, they’re easy to work with and will save you money in the long run.
Once you have all your supplies together, you’re ready to move onto the next step – making your own DIY makeup remover.
Creating Your Own Makeup Remover: Step-by-Step Instructions
Alright, let’s get down to business! Making your own makeup remover is actually incredibly easy, and requires only a few ingredients. For starters, you’ll need either natural oils or micellar water – these will be the key ingredients in your DIY remover. From there, grab a small container (preferably a glass one to avoid chemicals leaching into the product), and let’s get started!
Step 1: Prepping the Oils
If you’re using an oil-based remover, like jojoba or coconut oil, start by melting it down if it’s solid. You can do this by placing the container in a bowl of warm water for a few minutes until it becomes liquid. If you’re using micellar water, just keep it handy beside you.
Step 2: Mix It Up
Add equal parts micellar water and natural oil to the container (about 1/4 cup of each is sufficient for a single use). If you’re using essential oils, add a few drops now. Gently shake or stir the container to mix the ingredients together.
Step 3: Store and Use
Keep the container in a cool, dry place and out of direct sunlight. When you’re ready to use the product, shake it well and apply a few drops to a cotton pad or cloth. Gently rub the pad over your face until all of your makeup is removed.
Step 4: Clean Up
Once you’ve removed your makeup, rinse your face with warm water and wash with your regular cleanser. Don’t forget to follow up with moisturizer!
Now that you’ve made your own makeup remover, enjoy the benefits of a healthier and gentler product on your skin! Happy cleaning!
4. Benefits of Using a DIY Makeup Remover
Let me tell you, there are so many benefits to using a DIY makeup remover over store-bought options. For one, you’re able to control what goes into the product. No more guessing what mysterious ingredients will be applied to your skin! It’s also cost-effective, since the ingredients are typically inexpensive and can last a long time. Plus, most homemade makeup removers contain natural ingredients that can nourish and hydrate your skin while also removing your makeup.
Another benefit is that you can customize the recipe to best suit your skin type. If you have sensitive skin, for example, you can adjust the ingredients accordingly. And if you love a certain fragrance or essential oil, you can include it for a pleasant scent.
Oh, and don’t even get me started on the environmental benefits of DIY makeup remover. Besides being plastic-free, many store-bought makeup removers come in non-recyclable packaging and contribute to unnecessary waste. With a DIY alternative, you can reduce your carbon footprint and feel good about your impact on the planet.
Overall, the benefits of a DIY makeup remover are endless. Not only is it healthier for your skin, but it’s also better for your wallet and the environment. So go ahead, give it a try and see the positive impact it can have on your beauty routine.
Wrapping Up My DIY Makeup Remover
So, there you have it – my step-by-step guide to making your very own makeup remover. Hopefully, you found my instructions easy to follow, and, most importantly, you are now a proud owner of a homemade product that is healthier for your skin.
From personal experience, I have found that DIY makeup removers are gentler on the skin as compared to those chemically filled products you purchase from the store. Plus, they are cheaper and can be customized to your skin type and preferences.
If you’re still not convinced, let me remind you that the ingredients used in your homemade makeup remover are probably sitting in your kitchen or bathroom. So, give it a try – the worst that can happen is you make a mistake and adjust the recipe accordingly until you find what works best for you. And, if you do run into trouble, there’s a wide range of resources on the internet that offer tips and advice to help you out.
So, what are you waiting for? Experience the satisfaction of creating a product that is uniquely yours while being healthy and beneficial for your skin.